Tuesday, February 27, 2007

Cooking With Pig: Act III--Finalemento!

In her "Master Cook" column in the February 2007 issue of Food & Wine, Paula Wolfert calls this last step in a recipe for Provencal pork stew the "garnish." I have no idea why the editors decided to place this label on what essentially is the separate sauteeing of mushrooms, which are then added to the stew or daube and cooked again in the oven. Even in the French nomenclature, garniture does not seem an apt description for this process. Or maybe "garnish" is traditional to Provencale daube making. If so, it would have been nice to know.

In any case, it is now time to pull your daube out of the refrigerator. When you remove the lid, you will undoubtedly see a layer of creamy to golden looking fat. Use a tablespoon to remove as much of this fat as possible. This is a great advantage of cooking stews and braises in advance: the fat congeals in the refrigerator, making for easy removal before you serve it. Now lets set the pot of daube to the side, turn the oven up to 250 degrees and focus on the mushrooms. For this, the final step, you will need:

3 Tbs extra-virgin olive oil

1 1/2 pounds mixed mushrooms, such as cremini, oyster, French horn, shitake

Salt and freshly ground black pepper

4 garlic cloves, minced

1/3 cup finely chopped parsley

1 teaspoon red wine vinegar

In a large skillet over moderately high heat, heat 2 tablespoons of the oil until it begins to smoke. Add the mushrooms, reduce heat and season with salt and pepper. Cover and cook over moderate heat until the mushrooms are tender. If there is liquid at the bottom of the skillet, remove lid and continue cooking until liquid has cooked off. Add remaining oil and garlic and cook until fragrant, about 3 minutes. Stir in parsley.

Mix the cooked mushrooms into the daube. Place pot in the oven uncovered and cook 1 1/2 hours, or until the meat is very tender. Remove from the oven and stir in the vinegar.

Your daube is now ready to serve. But, if you're like me, your dinner party is still a day or two away. So back into the fridge the pot goes, to be reheated again at a later date. Not to worry, it will only get better with all the re-heatings.

Cooking With Pig: Act II

Say hello to a Berkshire pig, one of many heritage breeds people are seeking out for that old-fashioned fattiness and flavor that is typically missing from the average supermarket pork. In case you've been asleep for the last 35 years, pork has become a commodity product, raised literally cheek-by-jowl on huge, stinking factory farms and bred to be lean, lean, lean because of our misplaced abhorrence of fat (we should be more worried about the calories we consume in that chicken-pasta salad, people). I've mentioned Niman Ranch pork, sold at Whole Foods, at least a zillion times already. In the Washington, D.C. area, also check out Eco-Friendly Foods at http://www.ecofriendlyfoods.com/, or your local farmer's market. More and more local farmers are offering naturally-raised pork, beef, lamb, etc. (Suggested reading: The Ominivore's Dilemma: A Natural History of Four Meals, by Michael Pollan.)

If you do decide on Niman Ranch pork, you can throw your meat clerk for a loop by asking for the name and contact information of the farmer who raised it. This was suggested to me by the founder of the Niman Ranch pork cooperative and although I had to work my request up the chain of command at my local Whole Foods, and although it took the meat manager a few hours to track down the information, I indeed got an e-mail address for a farmer in Nebraska and I did send off a note. The return e-mail I received from the farmer and his family (complete with family photo) was so gracious and thankful, it almost brought a few of us to tears. So do try it.

And that brings us to today's mission: Step II of our three-day Provencale pork stew or daube, courtesy of Paula Wolfert in the February 2007 edition of Food & Wine.

If you've been following along, now would be the time to remove the bowl or pot of pork that has been marinating in the refrigerator since sometime yesterday. Today we're going to be browning the meat and putting the stew in the oven for the first of two cookings.

What I do at this point is place a large baking sheet on the kitchen counter and cover it with paper towels. Uncover the marinated pork. Most of the bright pink color will have changed to a dull tan. Use a pair of tongs to lift the pieces of pork out of the liquid. (Save the bouquet garni and the marinating liquid, but discard the spice bundle). Shake the liquid off the pork pieces and place them on the paper towels. Use more paper towels to blot the meat dry. You want them good and dry before you brown them. Now, season them aggressively with kosher salt and ground pepper. To proceed, you will need:

1 1/2 ounces dried porcini mushrooms, soaked in a bowl of hot water until soft

1 tablespoon all-purpose flour

2 1/2 tablespoons brandy

1 large onion, thinly sliced

1 large carrot, cut into 1/2-inch dice

4 ounces fresh pork skin with a thin layer of fat, cut into 2-by-1/2-inch strips (optional)

1 head of garlic, separated into cloves but not peeled

10 crushed juniper berries

salt and freshly ground black pepper to taste

parchment paper

In a large, heavy pot or Dutch oven over high heat, heat 2 tablespoons of the oil until it starts to smoke. Reduce heat to medium-high. In batches, brown the pork pieces all over, then set on paper towels to drain. (This would be the point where my wife has a meltdown, pleading, "Do you have to cook like this? Can't you see you're getting grease all over everything?") Look extremely contrite and promise to clean up. Then return all of the pork to the pot and over moderate heat sprinkle meat with flour. Stir until flour is completely dissolved. Pour brandy over meat and use a long match or lighter to ignite the brandy. Shake the pot occasionally until the flames die out.

Remove the pork to a plate. Add the remaining 1 tablespoon olive oil to the pot and, over moderate heat, add the onion and carrot. Season with salt and cook, stirring occasionally to incorporate the brown bits stuck to the bottom of the pot, until onion is soft and lightly browned, about 10 minutes.

Lift porcini mushrooms from the soaking liquid and chop roughly, reserving the liquid. Add mushrooms to pot and cook another 3 minutes, stirring.

Pre-heat oven to 250 degrees.

Remove pot from heat. Use a slotted spoon to remove onion, carrot and mushrooms. Reserve. If using pork skin, cover the bottom of the pot, fat-side down. Spoon 1/3 of the pork, 1/3 of the vegetable mixture, 1/3 of the garlic clove over the pork skin. Season with salt and pepper. Sprinkle a few juniper berries. Repeat this layering process 2 more times, until all of the ingredients are used up. If not using pork skin, forget the layers: just mix the pork and other ingredients in the pot.

Pour the reserved marinating liquid and the reserved mushroom soaking liquid into the daube. Tuck the reserved bouquet garni into the meat. If necessary, add enough water to just barely cover the meat. Place a round of parchment paper over the meat. Over moderately high heat, bring the daube to a boil. Cover the pot and place it in the oven. Bake for 2 1/2 hours. Remove pot from oven and allow to cool. Discard parchment paper and bouquet garni. Refrigerate daube in its pot overnight.

Tomorrow, we remove the fat from our daube, add sauteed mushrooms and cook one more time...Are you hungry yet?

Monday, February 26, 2007

Cooking With Pig: Act I


No, this is not a picture of an earthenware bong, but rather a daubieres, which is French for a strange, pot-bellied cooking vessel with a narrow top primarily used for cooking certain stews known in the Provencal lingo as daubes. That would make this one of several items that I did not possess for this particular pork stew recipe. Nonetheless, I had been saving this recipe from the February 2007 issue of Food & Wine because it was written by Paula Wolfert and because it celebrates one of our favorite animals. In fact, this recipe, which came to Wolfert via food writer Barbara Wilde, who lives in Provence, sat next to my computer keyboard for the longest time, occasionally migrating down to the kitchen table and back with the stack of other paperwork that needs sorting through from time to time, just waiting for that moment when I had nothing better to do for a couple of days and the weather called for a nice, comfy stew.

Yes, you heard right: a couple of days. Or maybe even three or four. If you know anything about Paula Wolfort, you know that she is all about authenticity. There are no shortcuts in Paula Wolfort's vocabulary. So if it is possible to consume the better part of three or four days making a stew, you can bet Paula Wolfort is all over it. That is why we reserve an honored place on our bookshelves here at The Slow Cook for titles such as The Cooking of Southwest France and The Slow Mediterranean Kitchen. These are books that transport you to kitchens where people truly care about methods and ingredients and flavors. To hell with the time involved. Paula Wolfert's idea of a weight loss plan is the 30 million steps it takes to get from the butcher's to the finished stew. So be prepared to stumble over ingredients, cooking utensils, methods with which you are completely unfamiliar. Be prepared to adjust, make substitutions, use your own judgment. For instance, do not spend half a day driving to every gourmet shop in town looking for lavender flowers in February.

Lavender flowers would be just one of the ingredients that put my inadequacies as a gardener/cook on full display. Just down the street from our house is a huge lavender bush--it must be five feet around--that we pass every day on our walk to school. If memory serves, it was in bloom around November, and we were constantly running our hands through the blossoms as we passed by to pick up some of the aroma. We smelled like we'd been mugged by a bar of lavender soap. If I had been thinking at all, I would have gathered a peck of those blossoms, dried them out and stored them in the freezer. They were free for the taking. But of course I didn't, and now for the second time in as many week's I've run across a recipe calling for lavender flowers.

Another trouble item would be winter savory. I'll be damned if there is any winter savory in any of the spice racks I've searched, or among the fresh herbs for sale at Whole Foods. I tried growing summer savory in my garden this past year without much success. If I were anywhere near the gardener I claim to be, I now realize I would have some winter savory growing somewhere, or I would have grown it and stashed it away for just such an occasion. Again, out of luck. My solution to the lavender blossom/winter savory dilemma was to tie some herbes de provence in the spice bundle that Wolfert calls for.

A daubiere: Again, I plead guilty. I do not own a daubiere. I wonder if Wolfert does. She owns just about every other piece of exotic cookware, but she did not linger long on the daubiere. Fortunately, you are allowed to substitute a large, heavy pot or Dutch oven, of which I have plenty.

Wild boar: The orginal recipe that Wolfert describes calls for wild boar. And according to the piece in Food & Wine, she did try boar from a couple of sources. If your local grocery doesn't carry boar, and you can't wait for FedEx to bring you some, by all means use the best pork shoulder you can find, such as the Niman Ranch pork from Whole Foods.

Pork skin: The original recipe calls for sheets of pork skin, with not too much fat on it, cut into strips. These are used to layer the ingredients inside the stew pot. Sorry, I did not have any pork skin handy.

And that brings me to a few nits I'd like to pick with this recipe, which falls in the "Master Cook" column. I don't know if the fault lies with Wolfert, or if her editor's eyes simply glazed over around Step 359, but I did find these irritating, especially considering the many hours I've spent answering silly questions from editors and recipe testers over the years.

For instance, whatever is supposed to happen to all that pork skin? The instructions clearly call for strips of skin to be placed inside the stew pot to create layers of ingredients. But the subject of skins never comes up again. Do we eat them? Pull them out and admire them? Turn them into a lamp shade?

Why reduce? You are supposed to mix a leftover marinade liquid and the liquid leftover from soaking some dried mushrooms in a pot on the stove and reduce it "to about 2 cups." Then you drain this into the stew pot, and add water to cover the meat. Why bother reducing the original liquid only to add water?

Why "garnish"? After the stew has cooked the first time, you are instructed to sautee a large quantity of mushrooms, garlic and parsley as a "garnish." But then the cooked mushrooms are stirred into the pot, and the pot returned to the oven. So how does this constitute a "garnish?"

Which wine? In the introduction to the recipe, Wolfert states very clearly that she marinates the pork in white wine. Two days later, and after you've followed all 3,000 steps, you arrive at this startling paragraph, the very last paragraph in the article:

"Although this Provencal stew is made with white wine, it's so hearty that a red will make a better match. Conveniently, the rustic and substantial wines of Provence, where Barbara Wilde lives, have a rich fruit bolstered by a firm tannic structure, making them an ideal choice."

Serves me right for not listening to my wife, who never tires of reminding me that I should always--always!--read recipes through to the end (and maybe back again) before I start cooking. But really, don't you think this kind of information should go near the top, when you're making your shopping list?

I am calling this Pig in Three Acts because the recipe conveniently breaks down into three stages, performed over three days. The first, or Act I, consists of marinating your beast.

3 pounds boneless pork shoulder, cut into 2 1/2-inch pieces

1 bottle red or white Provencal wine

1 medium onion, thinly sliced

1 medium carrot, cut into thick slices

Bouquet garni: 6 sprigs each of parsley, thyme and winter savory, plus 2 bay leaves and 1 leafy celery top, tied together with twine.

Spice bundle: 1/2 teaspoon lavender flowers, 12 crushed peppercons and 10 crushed juniper berries, tied in cheesecloth (this is where I placed 1 teaspoon herbes de Provence to substitute for my lack of winter savory and lavender flowers).

2 tablespoons extra-virgin olive oil

Put the pork into a large, non-reactive bowl or pot. Add wine, onion carrot, bouquet garni, spice bundle and olive oil. Cover and refrigerate overnight.

Continued tomorrow...

Saturday, February 24, 2007

Someone From Grocery Team to Customer Service, Please!


I am not afraid to use the Customer Service desk at Whole Foods. In fact, I've spent a good deal of time at the Customer Service desk. So if you are at Whole Foods and hear over the loudspeaker, "Someone from the grocery team to Customer Service to assist a customer," that's probably because I need something and I can't find it. When I can't find something, I don't waste time looking for it anymore. I don't even pretend to keep up with the way things move around at Whole Foods. Intead, I go straight to the Customer Service desk and wait for a "team member" to show up. Isn't that what Customer Service is for?


But 99 times out of 100--and not necessarily at Whole Foods; it could be anywhere--after you explain to the grocery "team member" that you are having trouble locating, say, the dried porcini mushrooms, that they're always hanging on a little rack at the end of the aisle with the olive oil and capers, but today they don't seem to be there, the first thing the "team member" does is lead you right back to that exact spot next to the olive oil and capers and look for the porcini mushrooms exactly where you already said they weren't. Then the "team member" will start looking around at other shelves--the canned vegetables, the beans, the marinated artichoke hearts, the hearts of palm--and you realize that this "team member" has not a clue where the dried porcini mushrooms are any more than you do, and that when you went to the Customer Service desk you should have asked for the store psychic.
I don't know why we go into a grocery store thinking the employees know where everything is (perhaps because we see them stocking the shelves?), because it just isn't so. They usually don't know diddly.


But, really, I don't mind. This has happened so often, I know the drill by heart. It's kind of like Groundhog Day. You're Bill Murray and each morning you wake up and you're back at Whole Foods following a "team member" around looking for some missing item. After the "team member" scans a number of aisles where your missing item cannot possibly be, you get 20 Questions, starting with, "Did you check our bulk section?" And after you explain that, yes, you did go through the bulk section, and mostly what you saw were raisins and granola and wasabi peas and such, but no dried porcini mushrooms, the "team member" will usually scratch his head and say something like, "Well, we just reconfigured the whole store and that's probably one of the items we discontinued." You mean, like when you got rid of the whole wheat couscous?


At this point you turn away to continue your shopping and hear the "team member" asking another "team member," Hey Frank, have you seen the dried porcini mushroom? And 99 time out of 100, the "team member" will track you down in the cheese section fives minutes later and hand you a package of dried porcini mushrooms. The "team member" has such a triumphant look on his face, you don't even bother asking where he found them. I much prefer to do my shopping this way, where you just plant an idea in the brain of a "team member" and let him scour the store for it. This is a great time saver.


Sometimes--on rare occasions--you do get unpleasant pushback from employees. Recently, for instance, I was in the Whole Foods looking for steel cut oats. For oatmeal, I much prefer the chewier, healthier steel cut oats to conventional rolled oats, and I always buy them in the bulk section. On this particular morning, I headed for the steel cut oats and what I found was the usual bin marked "Steel Cut Oat Groats." What was in the bin, however, was not the usual steel cut oats but a grain that looked a little like brown rice. I realized that these must be whole oat groats--not cut up at all, and not suitable for oatmeal--and I thought this was a great find, since I'd never seen whole oat groats in the bulk section before. Except they weren't the steel cut oats I was looking for.


Just then, a "team member" appeared on the scene and I explained that whole oats apparently had found their way into the steel cut oats bin by mistake. What followed was one of those surreal, "Who's on First?" conversations wherein the "team member" tried to convince me that what was in the bin I was looking at were in fact "oat groats," and I kept pointing to the words "steel cut," and he then said the "steel cut" oats must be "out of stock," and I replied, Then what is this stuff in the bin marked "steel cut"? Whereupon he tried to one-up me by claiming he was the "buyer" for the bulk section (and therefore knew everything) and I had to try and one-up him by claiming (truthfully) that I had been visiting that bulk section on an almost daily basis since the store opened three years ago and had everything in it practically memorized. When he couldn't find a good response to that, he tried to claim victory and walk away, saying, "Sir, please don't spit on me."


Well, I had no choice but to march up to Customer Service and find a manager to settle the dispute over the oat groats. And the manager proceded to explain that the "buyer" for the bulk section was really pretty new (as I had suspected all along). Then we marched back to the bulk section and all three of us had a little huddle over the bin marked "steel cut oat groats," wherein the manager explained to the "buyer" that what was in the bin were indeed oat groats, but not the "steel cut" variety (Exactly!). The manager told the "buyer" to change the label on the bin to accurately reflect its contents. Then the manager walked me around the corner to another dry goods aisle and introduced me to a box of steel cut oats that solved the problem temporarily, at a cost probably three times what I would have paid for steel cut oats in the bulk section.


But, as I said, I really don't mind all this. I know there is a lot of turnover in the ranks of the "team members." They can't be expected to know everything. Where the bulk section is concerned, I see my role as a kind of volunteer ombudsman, a concerned friend of Whole Foods who will take the time to make sure the oat groats are accurately labeled and the rest of the section properly organized. In fact, one time when I was looking in bulk for brown basmati rice I found that the bin marked "brown basmati rice" was filled instead with a completely different variety of short grain brown rice. Further inspection revealed that the same short grain brown rice had insinuated intself into a total of three different bins, all with different labels. Of course, I was kind enough to point this out to the nearest "team member."


This particular story has a happy ending, though. About a week after the oat groats incident, I returned to the bulk section for some quinoa or something and bumped into the "buyer" and he was smiling from ear to ear. He practically threw his arms around me like a long lost friend, saying, "Did you see?" And he directed me to one of the cereal grain bins and there was a bin brimming with steel cut oats. As instructed, he had changed the label. It now read, simply, "Oat Groats." Still, the steel cut oats had been restored. The "buyer" and I had bonded like war veterans. And all was right with the world.


Friday, February 23, 2007

Best of the Pig


Some of you are probably convinced I spend half my days gazing into the meat display at Whole Foods. Well, you would be wrong. We don't have that much meat in our diet. In fact, there are so many scraps and leftovers from our catering work that we hardly do any grocery shopping at all for ourselves. We usually reserve meat for special occasions when friends come to dinner. But sometimes you just can't do without a little bit of meat in your cooking. Ham hocks, for instance, hark back to another era. In some dishes, such as old-fashioned split-pea soup, they are almost indispensable.


I recently noticed ham hocks at the Whole Foods. I don't know if that means they just started carrying ham hocks, or if I just never noticed before. But I shop there almost on a daily basis and suddenly there were these wonderful, gnarly looking ham hocks under the sausage and bacon display, along with packages of salt pork, which I also had not seen previously. Whole Foods carries Niman Ranch pork, a brand that is more like a cooperative of pork farmers, mostly in the Midwest, who have rejected the factory farming, feedlot methods of raising pigs and are trying to make a go of it by raising pigs outdoors and sometimes on pastures. Consumers are catching on. Niman Ranch farmers can't raise enough pigs to meet the demand. Their pork is fattier, more succulent, more flavorful than the pork you typically find in the average supermarket. So I was glad to see that Whole Foods was expanding its pork offerings to traditional items such as hocks and salt pork (its a smooth product that has actually been salted). Otherwise, I have to travel halfway across town to the butcher at Eastern Market, where they carry smoked jowl and smoked neck bones and bacon ends and pig's feet and pork brains and all sorts of other delightful stuff in addition to traditional hocks.


My parents used to make split pea soup with a big ham bone leftover from Sunday dinner. The bone still had plenty of meat, fat and gristle on it that always managed to work its way into the soup. The soup was thick, almost pudding-like, and not so easy for a kid to swallow, especially when a glob of fat turned up on your spoon looking you right in the eye. If you have such a ham bone, by all means use it in your soup. Otherwise, a couple of ham hocks (there are usually two to a package at the grocery) is an inexpensive way to infuse your soup with lots of flavor and not a terrible amount of fat.


This particular recipe couldn't be any easier. It's really just a slight modification of a split pea soup found in The Joy of Cooking. As a bonus, I am including farther down a recipe for a Southern souffleed corn bread advocated by Bill Neal in his book, Biscuits, Spoonbread, and Sweet Potato Pie. As a further bonus, I am including a recipe for an Indian-style split pea soup in case you are vegetarian but all of a sudden have an uncontrollable urge for split pea soup for some reason.


Split Pea soup

Serves 6-8 persons


2 cups green split peas

3 tablespoons extra-virgin olive oil

1 medium onion, diced small

2 medium carrots, diced small

2 stalks celery, diced small

1 teaspoon kosher salt

2 ham hocks

8 cups water

1 sprig thyme

1 bay leaf

1 teaspoon cumin

freshly ground pepper to taste


Soak the dried peas in a large bowl of water for five hours, or place in a pot of water, bring to a boil, then remove from heat and let steep for 1 hour. Drain and set aside.


In a heavy pot or Dutch oven, heat oil over high heat till it begins to smoke. Add onion, carrots and celery, season with salt and reduce heat to medium-low. Cook, stirring occasionally, until onions are soft, about 8 minutes. Add remaining ingredients, raise heat and wait till soup begins to boil, then turn heat to low and cook slowly for 3 hours, or until peas are perfectly soft.


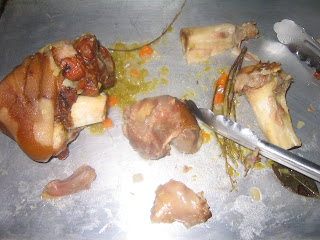
Remove ham hocks, thyme and bay leaf. Set the hocks aside to cool. Meanwhile, run all but one cup of the soup through a blender in batches. (Remember to hold the lid down with a kitchen towel so you don't burn your hand.) The soup should be smooth, except for the bit of texture added by the last cup of unblended soup. When the hocks are cool enough to handle, take one of them and remove the fat. Find all the meat and break it in little pieces into the soup. Eat the other hock later with some good mustard, a slice of crusty bread and a bottle of beer. Or, feed it to the dog.


Souffleed Corn Bread

Makes 10 Wedges


Make this in your favorite 9-inch iron skillet. If you have an iron skillet reserved for corn bread, all the better. In his book Biscuits, Spoonbread, and Sweet Potato Pie, Bill Neal gives several recipes for corn bread ranging from the most basic Appalachian variety to the more refined "Company Corn Bread" reserved for special occasions. Neal was a celebrated revivalist of traditional Southern foods who spent quite a bit of time researching the origins of his preferred cuisine. His death from AIDS at age 41 was a loss to everyone who appreciates good regional American food. Corn bread is a classic pairing with split-pea soup, and requires hardly any effort at all.


Before you do anything, turn your oven on to 425 degrees, or you'll be standing there with your batter ready, waiting for the oven.


9-inch, well-seasoned iron skillet

1 1/2 cups white corn meal

1/2 cup all-purpose flour

2 tsp baking powder

1 tsp baking soda

1 tsp salt

2 eggs, separated

1 1/2 cups buttermilk

3/4 cup creamed corn

3 Tbs butter


In a large bowl mix together corn meal, flour, baking powder, baking soda and salt. Meanwhile, in a separate bowl or liquid measurer, mix the buttermilk, eggs and creamed corn. When the oven is ready, put the skillet in it to get hot. Melt butter in skillet, then stir into the buttermilk-egg-corn mixture. Return skillet to oven to get even hotter.


In a separate bowl, beat the egg whites to stiff peaks. Pour the wet ingredients into the dry ingredients and stir just until everything is incorporated. Fold in egg whites. Remove skillet from oven. Pour in batter. It might sizzle a little. That's a good sign. Return skillet to oven and cook about 30 minutes, or until cornbread is lightly browned and a tooth pick inserted into the middle comes out clean. Place skillet pan on a cooling rack. As soon as possible, remove corn bread from skillet and place on cooling rack. (I usually just invert the bread into a hot pad in one hand, then gently flip it over again onto the cooling rack.)
Indian-style Split Pea Soup
Serves 6-8 persons
Indian cooking is almost completely unexplored by most American cooks and that's a shame, as Indian cuisine (or cuisines, really) turns humble ingredients into fabulous flavors by making maximum use of aromatic spices. Once you have the ingredients, the cooking is not hard to follow. Try to track down an Indian grocery in your area. In India, split peas and other dried legumes are referred to as "dal." I am including this version of split pea soup because my wife says she likes it better than the traditional soup with ham.
1 pound split peas (green or yellow), soaked 5 hours in a large bowl of water, or broght to a boil in a pot of water, then set aside to steep for 1 hour.
3 tablespoons vegetable oil (or ghee, if you are familiar)
1 tablespoon grated fresh ginger
1 serrano chile, seeds and veins removed, then minced
1 1/2 teaspoons cumin seeds
1 teaspoon turmeric
7 cups water
1 stick cinnamon
8 whole cloves
4 black peppercorns
1/2 cup grated, unsweetened coconut
2 tart apples, peeled and grated
1 1/2 teasponns kosher salt
1/4 cup chopped cilantro leaves
In a heavy pot or Dutch oven, heat oil (or ghee) over moderately high heat. Add ginger, chili, cumin and termeric and cook, stirring frequently, until cumin seeds are lightly browned. Add water. Tie cinnamon, cloves and peppercorn in a piece of cheesecloth or place in a tea ball infuser and add to pot, along with peas, coconut, apple and salt. Bring to a boil. Reduce heat, cover and simmer gently until peas are very tender, about 3 hours.
Remove and discard cheesecloth containing spices (or simply remove tea ball infuser). Ladle half the soup into a blender and blend until smooth. Return soup to pot. Stir in chopped cilantro and serve.


Thursday, February 22, 2007

That's Entertainment?


Our common urge to gather around the same campfire is strong. But I really question the food and drink being served, and the prices we are being asked to pay.

I spent the evening last night at a hockey game in downtown D.C. My brother-in-law had been gifted with tickets for seats close enough that you could count the nose hairs of the left wingman. It was pretty entertaining and just a little like a carnival ride when the players came crashing into the glass on the sideboards. There is a great rattling and shaking and ca-BOOM-ing, as if the game is going to spill into the stands that very instant and bring the roof down.

But I have to say I was a bit put off by the $7 fee being charged for 12-ounce beers, of which we drank two each. And I don't want to throw cold water on the whole event, but it did seem to me that most of the civilians in the arena were doing quite well already in the calorie consumption department. So why were so many of them sitting with dumpster-loads of French fries and cheese nachos in their laps? Okay, so the game started at 7, just about dinner time. Still, I've always wondered at these sporting events, if you think you're going to be hungry, why not just eat a nice meal before you leave the house? Aren't we always telling our kids to pee before they leave the house? And why is that again? Oh, right. So they don't have to do it at some inconvenient time later. Why can't adults follow their own advice?

When we left the game, the Capitals were locked in a tie with a team from of all places San Jose, CA, where I guess it's been cold enough lately to play hockey. (Must be La Nina). We had a few minutes to kill so we ducked into the Clyde's restaurant around the corner, just about everything in the world being conveniently just around the corner from D.C.'s downtown sports arena--except Chinatown, which gave its name to this neighborhood, but has since been priced out by all the hip new development. Chinatown has moved to suburban Rockville.
At Clyde's we parked at the bar in front of a super-wide-screen television where we got an even better view of the Capitals game. It ended in defeat for the home team after a dismal performance in a three-point shootout. We ordered some fried calamari and an hors d'oeuvre pizza and boy were they bad. The calamari was overcooked. The pizza was limp and soggy. Does management taste the food anymore? Or does the chef check out sometime before 10 pm? This is the kind of food you should give away with the booze. Check that: This food shouldn't even be offered free. Even free food should be better than this. But at a minimum, you should be embarrassed to charge for it.

Despite the indigestible food, we were barely able to squeeze past the crowds waiting to get in the place on our way out. It was past my bedtime, but the junior- and Ms.-executive types were just getting started. And this on a Wednesday night. Even when the food is bad, our urge to gather around the same campfire is strong...

Wednesday, February 21, 2007

Simple Tools, Nature vs. Culture


Sometimes simple tools are the best, and I find that the simpler they are, the more I use them. Usually, I'd rather mash something up in my molcajete than go through the trouble of heaving my cuisinart out of its place in the kitchen cabinet, then disassembling it and cleaning all the parts, only to have to put it back together again and heave it back into its spot in the kitchen cabinet. (I suppose if I had a kitchen counter a mile long, or a professional kitchen, or a wife who did not insist that things be put back in their place, I could just let the Cuisinart sit out somewhere and not do all this heaving.)


Take this potato ricer. I think I bought it for a dollar at a flea market one year when we were vacationing in Maine. (We were actually looking for old cast-iron pots, only to discover--silly us--that old cast-iron pots are now collector's items and fetch a small fortune in the flea markets.) This particular potato ricer is probably older than I am. But unlike most of the tools made these days, it was built to last and it has. It performs one useful function that I know of--turning cooked potatoes into thin little micro-streams of potato--and does it without fail, every time. It washes fairly quickly, folds neatly and just sits in its place in a drawer, waiting for the next batch of potatoes.


Not that I personally advocate a potato ricer for making mashed potatoes. From what I can tell, the world is divided into two camps: people who gag on mashed potatoes that are not as smooth as velvet, with no discernable lumps, bumps or odd bits, and people who just like potatoes and don't care whether they're whole or mashed or squashed or smashed with the skins on or off or loaded up with a bunch of dairy or just infused with a little extra virgin olive oil. I happen to fall into the latter camp: You can serve me potatoes any old way, dressed with a little olive oil and parmesan cheese. I don't mind them lumpy. In fact, I think "perfectly" mashed potatoes--i.e. those made with the ricer--fall into the category of "fussy" food for "fussy" eaters, and normally I wouldn't make these for myself. These particular mashed potatoes are for a client whose preferences I don't know.


And that is what I find most interesting about mashed potatoes, that our cultural default setting is the smooth-as-velvet kind of potatoes, usually with a load of butter (not olive oil) and cream or possibly milk. Add up the ingredients and it is immediately apparent that these kind of potatoes on a macro level are not a healthy food (the butter, the cream), although they may be texturally pleasing on the level of, say, baby food. And on a micro level we are finding that mashed potatoes are a poor choice because the starch contained therein enters the blood stream that much more quickly when the potatoes are pulverized to the point of being atomized, causing spikes in blood sugar, resulting in spikes of insulin, resulting in a spiral of hunger-eating-weight gain and eventually--potentially--diabetes. Am I saying that one little scoop of mashed potatoes with butter or gravy will lead you straight to hell and elevated blood sugar? No, but isn't it interesting that we have a cultural preference for the texturally (and I might add, visually) less interesting and less healthful super-fine mashed potatoes over the just-smashed-and-drizzled-with-olive-oil variety...


Yet it is thus almost everywhere you look. Not just with potatoes. Our biases run in the same direction with virtually all foods. Whole grains, for instance, are still shunned by most. Yet anyone who has tried a loaf of well-made, whole-wheat bread knows it is vastly superior in taste and texture to the ubiquitous white bread. Anyone who has tried steel cut oats, or oat groats, knows they beat the pants off any brand of instant oatmeal for flavor and for chew. And anyone who has tried brown rice knows that is far superior in taste, mouth feel and healthful benefits than your standard white rice. The cultural bias that we cooks are constantly fighting has always been toward the more refined, the smoother, the plainer, the whiter. And that's because this is not a matter of taste or texture or health, people. This is, in its cultural origins, a matter of class. Those who can afford it want their bread white, not brown. Those who can afford it want their rice white, not brown. Whatever it is, they want it polished and refined and bleached. The whiter the better. If nutrition and flavor are lost in the process, so be it...


This made sense to me, and yet it did not, specifically in the area of rice. I have never been a big fan of white rice. My daughter loves white rice smothered with soy sauce. But to me, white rice is just the Asian equivalent of Wonder Bread. It has no flavor. It's too white. It is the culinary equivalent of library paste. I much prefer brown rice, its chew, its nutty flavor, the woodsy aroma of it bubbling slowly in its pot on the stove. So if brown rice is that much better, and white rice would be the rich man's rice, why is white rice the poverty food of Asia? This question lay there on a subliminal level for ever so long, a question for the ages with no answer in sight. Then I experienced a Eureka! moment while reading a small book called The One-Straw Revolution by a Japanese farmer/author named Masanobu Fukuoka.


Fukuoka has become a cult figure through his Zen-master style of no-till, natural farming, or what he calls "farming among the weeds" and "growing vegetables like wild plants." He grows rice in dry fields, exchewing the traditional flooding or paddy culture. He believes that flooding to prevent weeds merely results in weaker plants more vulnerable to pests and disease. Fukuoka advocates no chemicals, no fertilizers, and less work in the fields. He confounds the experts with crop yields equal to or better than those of his neighbors who practice modern methods advocated by the agricultural establishment. Fukuoka argues that foods grown naturally, with less work, should be cheaper than those grown with high investments in machinery and chemicals. All very interesting, especially to an organic gardener such as myself. But the Eureka! moment for me came when Fukuoka turned to the subject of food, flavor, culture and, specifically, the eating of rice.


"Most people today have even become separated from the flavor of rice," Fukuoka writes. "The whole grain is refined and processed, leaving only the tasteless starch. Polished rice lacks the unique fragrance and flavor of whole rice. Consequently, it requires seasonings and must be supplemented with side dishes or covered with sauce. People think, mistakenly, that it does not matter that the food value of the rice is low, as long as vitamin supplements or other foods such as meat or fish supply the missing nutrients."


As far as I'm concerned, hearing this from a very wise Japanese farmer seals the deal on brown rice. But for Fukuoka, there is even more at stake. "When people rejected natural food and took up refined food instead, society set out on a path toward its own destruction," he says. "This is because such food is not the product of true culture. Food is life and life must not step away from nature."


To which I say, Amen brother. And keep your potato ricer in the drawer.


Tuesday, February 20, 2007

The Accidental Coq au Vin


I did not begin the week intending to make a coq au vin. But as so often happens, things kept pointing me in that direction. First, it was our turn to receive the chicken from the farm subscription we share with my sister and her husband. So there sat the bird the last several days, chilling in a bowl in our refrigerator, demanding some kind of attention. Then I noticed my wife, for no particular reason, had purchased some cipollini onions at the grocery store. ("I just thought they looked good," she shrugged). Then there was the half-used slab of bacon, not particularly well wrapped, just laying there in the fridge on top of some jars of Thai curry and such. Before you can say "Le Creuset" I was pulling one of my favorite books off the shelf in search of an "authentic" coq au vin recipe.

Why do I use quotes around the word authentic? The word seems to have come under a cloud. Or is it that we just question the true origins of everything these days, as if good food can't merely be good on its own terms, it must also have a certifiable pedigree? The fights are endless. For instance, how can a tomato pizza really be authentically Italian, when the Italians didn't even have tomatoes until they were brought from the Americas in the 16th Century? So I suppose you could question whether a French coq au vin is truly "authentic" if you consider the possibility that the original chicken came from, say, Armenia, and was first cooked in wine there. So, to be more precise, I guess I should say I was looking for a method of cooking coq au vin as we know it, namely, from somewhere where the cooking of coq au vin is not merely sport, not something people do occasionally to get their picture on the cover of a food magazine, but serious business going back a long, long time. That's why I reached for my copy of Mourjou.

If you love cooking in the fashion of people who really care about what they eat, who obsess over the freshness of the products they cook with, who cook in a manner that has been passed down for generations--if you care, in other words, about preparing food to be enjoyed for its fullness of flavor and in its own good time, then this is a book you should own. The complete title is, Mourjou: The Life and Food of an Auvergne Village, and it was written by a Brit expatriot named Peter Graham, who, besides writing books, also directs small films and writes about travel and art and psychoanalysis and a number of other things that make his life seem perfectly pleasant and sane. At some point more than 20 years ago he picked up and moved to this tiny village, Mourjou, in the province of Auvergne in south-central France, a sometimes mysterious place where lush valleys co-exist with dormant volcanoes, where a verdant landscape dotted with small herds of lazy cattle is cross-hatched with deep canyons and snaggle-toothed mountain peaks. There are also small villages such as Mourjou where ancient customs are still kept, where neigbhors nose around each other's kitchen gardens and where family recipes are guarded like state secrets. In particular, I treasure books like Graham's because books like Mourjou just aren't being written much anymore. Remember? We're all too busy to read well-written prose about food. We're just here for the recipes, or so they say...

Anyway, I thought Mourjou might be a good place to look for a coq au vin recipe and--Bingo!--I was right. In fact, Mr. Graham writes a nice little takeout on the means and methods of coq au vin, including an amusing explanation for why, throughout the text, he chooses to use the French word--coq--rather than the literal English translation. "I use the word coq because it is a way of avoiding the problem, in English, of the word 'cock', "Graham explains paranthetically. So I will follow Mr. Graham's lead.

The first issue to be surmounted, as usual, is which version of coq au vin to adopt. This is no less a problem for Mr. Graham. "Coq au vin is a dish, like potee, which is found in slightly differing versions all over France," he writes. (There we go again, the authenticity thing.) "There is even a slender tome called Coq au Vin, which contains sixty-one slightly differing recipes for the dish." Several regions of France lay claim to the "original" coq au vin. And even in the province of Auverge, there are disputes over which ingredients should go into a proper coq au vin and how it should be cooked. "Should it include the fowl's blood as well as wine? Should the lardons be smoked or unsmoked? Should the sauce be thickened with beurre manie and/or the mashed-up liver?" There are even questions about whether the bird should first be marinated in wine and--perhaps the most troubling question of all--must the fowl in question be an actual coq (meaning an older male), or can we use--perish the thought--a plain old ordinary chicken?

Graham doesn't say, exactly, how he resolves these dilemmas. He really ducks the question entirely (no pun intended). Perhaps he is guarding someone else's family's recipe secret. He does acknowledge some trouble finding an actual coq, even in his adopted village. He sometimes succedes by visiting a local farm. The wine, he says, should be "a dark earthy wine made on the hills overlooking Clermon-Ferrand." Then, after describing how the farmer's wife, Nicole, must be persuaded to charge for her time plucking and preparing the bird, Graham simply launches into a recipe. I just have to assume that Graham has resolved all the aforementioned issues to his personal satisfaction. So his is the recipe I've followed, more or less. Note: This dish needs to marinate 24 hours before cooking, and is even better if you give it another day to rest in the refrigerator after it has been cooked. You do the math.

Serves 6 persons

Graham calls for a coq "at least two years old." But if you can't find one of those, he will allow "a very large free-range chicken of the highest quality," about 4 1/2 pounds.

2 ounces lard, or, in my case, the grease from several slices of fried bacon (I didn't want to buy a whole tub of lard).

15 pickling onions (I used about a dozen cipollini onions of various sizes)

3 1/2 ounces salt pork, diced large

6 ounces button mushroom (I substituted cremini mushrooms)

For the marinade:

1 bottle dark, full-bodied red wine (I used a French Syrah from the Camargue area near Nimes)

bouquet garni: two sprigs thyme, 2 sprigs flat-leaf parsley, 2 sprigs winter savory (I omitted the savory--couldn't find any), 1 bay leaf

2 carrots, quartered

2 large cloves garlic

large pinch salt

freshly ground pepper to taste

As in most braises of this type, the meat is first marinated, then dried and browned in oil before all of the ingredients are assembled in the pot and placed in the oven.

Cut the coq (or chicken) into pieces: legs, thighs, breasts. Cut the breasts in half. Remove as much fat as possible and remove the skin from the breasts and thighs. Place the pieces of bird in a non-reactive bowl or pot, pour the marinade over it. Cover and refrigerate 24 hours.

The next day: Preheat oven to 250 degrees

Drain the poultry well, blotting any leftover moisture with paper towels. Save the marinade with its solids. Meanwhile, in a heavy pot, heat the lard (or bacon grease) over moderately high heat. Brown the poultry pieces well on all sides, in batches if necessary. Remove and set aside. Place the salt pork and onions in the hot grease, turning occasionally until the onions are golden. (If using cipollinis, they must be blanched in boiling water first, the skins removed.)

Remove the pot from the stove. Pack the poultry pieces, onions, salt pork and mushrooms into the pot. Pour the marinade with its solids into the pot. Place pot in oven and cook 2 1/2 hours, or until chicken is very tender but not falling off the bone. (Note: Graham calls for 2 hours cooking in a 350 oven, but I think 250 degrees is amore appropriate braising temperature to avoid overcooking.)

Allow the pot to cool. Remove all the poultry, onions and mushrooms and place on a baking sheet, separating and discarding the carrots, herbs and other solids from the marinade. Strain the cooking liquid into a separate container (you could use a grease separator at this point to remove most of the grease). Cover the cooked coq au vin and refrigerate it and the cooking liquid overnight.
The following day, skim fat off the surface of the cooking liquid. To serve: Reheat coq au vin in 250-degree oven. While this is reheating, chop the fowl's liver finely, removing any gristle. Just before serving, drain the cooking liquid through a strainer into a blender and blend it with the liver until smooth. Place the liquid in a small pot over medium-high heat on the stove and cook until somewhat thickened. Pour the hot liquid over the coq au vin as it is going to the table.

Monday, February 19, 2007

Composting with Style


As a sign of her everlasting love, my wife recently returned from a trip to the local World Market with what looked like a miniature trash can. It is metal, white and quite decorative, with the heft of a coffee can and a snugly fitting lid with handle. It can only be one thing: Our new counter-top composting receptacle.


Those of you who do not compost obviously are unfamiliar with certain housekeeping issues involved, such as, where do you keep all those potato peels, apple cores, used paper towels, coffee grounds and other kitchen scraps that accumulate daily and need to be saved in between trips to the compost heap in the side yard? In the past, we had simply used a stainless steel mixing bowl. But although our catering business is small, we generate kitchen scraps at a prodigious rate, especially since we make all our food from scratch. Think about all the skins and trimmings just from onions if you are preparing your own stocks and broths; the ends of celeries; the skins of rutabagas; the peels of carrots. Start adding the crusts from breads; the butt ends of baguettes; the filters full of used coffee grounds; the lemon that went mouldy; the orange rinds; the mushrooms that got lost in the crisper drawer. It all starts to pile up pretty fast, and heaps of it sitting in a bowl on the countertop did not suit my wife's sense of decor. So she spied this mini-trash can at World Market and snagged it. "I want my bowl back," she said.


Some of you are probably thinking this hoarding of bits and pieces from the kitchen is taking composting to an extreme, and I assure you it is not. As much as 25 percent of everything we send to the community landfill consists of kitchen scraps, things we can easily recycle by feeding them to our compost pile (or compost container, for you urbanites). Compost loves a diversity of ingredients and kitchen scraps provide a good balance of nitrogen and carbon, just right for the bacteria and other microbes that specialize in turning your garbage into humus for the garden. Of course this time of year your decomposers might not be particularly active. I've also included a photo of our own compost pile looking pretty much frozen over. I have to use a spade to pry open a spot to dump our scraps. There may be bacteria active way down in the middle of the pile. They will continue to work down to temperatures of about 50 degrees. And fear not: warmer temperatures are on the way. Look for a thaw soon.


Sunday, February 18, 2007

O Winter, thy touch is harsh!


Last year I erected a plastic "tunnel" in my front-yard vegetable garden to protect my plants from the winter freeze. I bought some galvanized metal electrical conduit, bent it into a series of hoops and covered it with plastic sheeting. (This was before I learned you can basically do the same thing much more easily with PVC tubing. But then, as a "sustainable" organic gardener, should I be using metal conduit, PVC or plastic sheeting? Let's save that one for another day...) This winter, I had to dive back into my Hawaiian shirts for clothing. The weather was absolutely balmy, and all the talk was about whether global warming would bring citrus culture to Washington, D.C. Well, as I kept reminding people, February can rear up and kick you in the butt, and this February certainly did that. We've had one of the longest streaks of sub-freezing temperatures in years this month. Even in the city, overnight temps have been in the low 'teens. And now we have a layer of hard-packed, ice-encrusted snow covering the garden, so it's any body's guess what's happened to all those salad greens, arugula, mustard, kale and collards that had been coming along so nicely just outside my front door, where I decided not to repeat my plastic tunnel. In the picture above, you can see my rather lifeless looking collards. One can only hope they haven't been utterly destroyed and somehow will find a way to resurrect themselves when things warm up again.
Which brings me to the subject of eating greens. Growing up outside Chicago, the closest thing to greens we ever saw on our dinner table was frozen spinach. But ever since we began our farm subscription, I've grown extremely fond of all those leafy brassicas I mentioned earlier. I particularly like the spicy, peppery taste of hearty arugulas and mustard greens. When these vegetables are grown outdoors, and if they are of the truly hearty varieties, their flavors only intensify in the winter cold. The particular farm we subscribe to, Even'Star Farm in Lexington Park, MD, specializes in breeding cold-tolerant greens. Some of you may remember me writing in the Washington Post food section a couple of winters ago about the farm's owner, Brett Grohsgal, and his passion for dressing up in Carhartt overalls in the middle of January and spending hours outdoors in the numbing cold, stooped over his improbably lovely fields of winter greens. The payoff for us was the box that arrived weekly from Grohsgal's farm, filled with bags of different greens, salad mixes, radishes, baby rutabaga, fresh eggs and all sorts of homemade jams and sauces, the occasional stewing hen.
The surprise for me was that not everyone had the same taste for greens. At a small dinner party I catered one evening, I served greens braised with red onion and pomegranate molasses, one of my favorite treatments. I wasn't quite sure how flattered I should be when the host introduced me to the rest of the guests saying, "He's the only person I know who can make mustard greens taste good." Another client I thought was enjoying the local greens I was serving in his weekly meals floored me one day when he said, "You know, I don't think I really like the greens. Could you maybe just give me a salad instead?" We had friends who discontinued their subscription because they just got tired of seeing greens every week and not knowing what to do with them.
I admit, on this latter point I had also stumbled. There was such a variety, and so little time. Arugula, cress, collards, kales, tat soi, pak choy, mustard greens...After a while, your eyes kind of glaze over. How could I possibly find a way to treat each of these as food? So, after a while, I didn't. What I decided to do was not treat each of the greens as individual food, but to treat them as ingredients. When the packages of greens arrived, I would fill a big pot with salted water, bring it to a boil and dump all the greens into the one pot and cook them through. Then I would chill them down in cold water, wring all the water out of them, and chop them up for use in a fritatta, say, or a soup. I'm sure in this process I was not doing justice to each and every one of the greens. Some of them may have preferred to be sauteed, or stir-fried, or just blanched. But I figured this small sacrifice was worth the greater good of actually consuming all the greens that Brett Grohsgal was growing for us. Still, I am always looking for new and better ways to use my greens. They don't seem to hold the attention of many food writers. So when I ran across a cookbook titled The Collard Patch, I couldn't resist. I had to buy it (I rarely fork over good money for new books) and see how authors Mary Lou Cheatham and Paul Elliott had managed to fill a whole book with collards.
To review briefly, The Collard Patch is a rather large paperback with a note on the cover that says, "Collard Country Cookbook and Reader Collards and Cornbread Y'all Will Love." Most of the beginning chapters covering collard history and collard culture--as well as using beer to kill slugs--are only a page long. There are also short chapters entitled "Dirt Eating, All the Facts You Never Wanted to Know," and "Lasting Magic of Collards, Pot Likker sustains Us Still." The real meat of the book is in the recipes, of which there are probably 150 (I didn't count them all.) These range from the most basic--Bacon Seasoned Collard Greens--to the decidedly plebeian--Collard Mayonnaise Souffle--to what you might call Haute Collards--Collard Crepes. And so many more ingenious turns on greens, such as Collard Hash Eggcups, Huevos Collards and Collard Tahini Pasta Casserole. And after you've completely exhausted yourself with collard recipes, you can kick back and enjoy some of Mr. Elliot's memoirs, consisting of a series of short stories such as, Alligator Snapping Turles, A Lapful of Cow and Jed, the Prickly Pear King.
Now, if that doesn't put you in the mood to eat some greens, I don't know what will. (You can find the book online at http://www.collardlovers.com). To further entice you, I leave you with my latest most favorite treatment for greens--a sweet potato galette with greens and fontina cheese. Making the galette works best with a large (11-inch), oven-safe, non-stick skillet.
12 ounces greens (can be kale, collards, mustard greens or combination)
3 large sweet potatoes, peeled
extra-virgin olive oil
1 wedge fontina (or fontal) cheese, grated
salt & pepper
Bring a large pot of salted water to boil. Place greens in boiling water, reduce heat and cook until greens are very tender, about 20 minutes. Remove greens and plunge into a bowl of very cold water in the kitchen sink. Drain greens through a collander, pressing as much water as possible out of the greens. Chop the greens roughly and set aside.
Pre-heat oven to 350 degrees.
Meanwhile use a mandoline or vegetable slicer to slice the sweet potatoes very thinly, about 1/8-inch. Heat your skillet over medium heat and moisten the bottom and sides with extre-virgin olive oil (or a good spritz of spray oil). Lay sweet potato slices in an overlapping pattern--like shingles--to cover the bottom and up the sides of the skillet. Cover the layer of sweet potatoes with a sprikling of cooked greens. Season with salt and pepper. Add another layer of sweet potatoes. Cover this layer with grated cheese. Continue making layers in this pattern until the skillet is full but not overflowing. If you have a flat pot lid that is just slightly smaller that the inside of your skillet, use it to press down on the your galette firmly. This will help fuse the layers together. Now place skillet in oven on a baking sheet (in case some of the cheese spills out) and bake for about 45 minutes, or until the potatoes are very tender. Test for doneness with a trussing skewer or the tip of a paring knife.
Remove the skillet from the oven and allow to cool for an hour or more, or even overnight. Then carefully invert the galette onto a large plate or carving board and slice into wedges. The wedges can be re-heated in the microwave or in an oven on a baking sheet. Serve with roast pork, turkey or chicken.


Friday, February 16, 2007

Homemade Sauerkraut & Choucroute Garnie


I know I am not the only Washingtonian who heaves a sigh of relief when winter finally arrives south of the Mason-Dixon line. Summers here are notoriously muggy, besides which I grew up in Chicago, so I have a certain amount of ice water in my veins. Shirt sleeves in December just seem unnatural to me. There should be frost on the pumpkin at least by Thanksgiving. These kinds of traditions are fading because we no longer recognize the conventional seasons. Thanks to cheap fossil fuels (for how long?), we can now get virtually any kind of fruit or vegetable any time of year. It's just that I don't want to be eating tomato salad in January. I think eating "fresh" asparagus when there's snow on the ground is an abomination. No, when icicles are hanging from the gutters I want to be eating root vegetables (perhaps my rutabaga souffle, but that's another story). I want to be roasting beets, or cooking onion soup. Or, better still, simmering a pot of my own fermented sauerkraut. This time of year, we are trekking to the butcher's for all the fatty and smoked pieces of pork that become the protein component of an unctuous, scandalously calorie-rich batch of choucroute garnie--featuring, of course, the sauerkraut that has been aging ever so quietly in the back of my house since about two months ago.

Perhaps you have an older relation who remembers grandpa feeding a smelly old barrel of kraut in the basement. I use a five-gallon bucket from the paint store. I slice maybe 30 pounds of garden-variety cabbage, mix it with pickling salt, pack it into the bucket, cover it with a ceramic dinner plate and--voila--in matter of weeks, and courtesy of some friendly bacteria that happen to be living on the cabbage when you buy it at the store, your kraut has fermented into the briny, vegetable equivalent of caviar. Green gold. Brassica for the gods...

I know you're thinking that creating delectable sauerkraut must be more complicated than I am making out, and I swear it is not. No fancy chemicals, no elaborate formulae, no expensive equipment. You're probably also thinking, Fermentation? Isn't that how you make beer? Or wine? Well, yes. And cheese. And yogurt. Fermentation is really just a food preservation technique that doesn't involve cooking, or canning, or refrigeration (although you may want to refrigerate your sauerkraut once it reaches the desired state of ripeness, to slow down the fermentation process. But more about that anon.) What fermentation really is rot in progress. Bacteria or other micro-organisms are munching away on the food in question (grapes, hops, cabbage, milk) and decomposing it until it reaches the point where we humans want to eat it. Just about every culture has a taste for something rotten. Cheese and sauerkraut in Europe. Yogurt in Central Asia. Miso in Japan. Kimchi in Korea. Sourdough bread in San Francisco? Need I say more?

Sadly, most of the sauerkraut we consume these days is not alive, or even that tasty. It's been made in a factory, then pasteurized for safety reasons. Not only is the vibrant flavor of freshly-made sauerkraut missing, but the live bacterial cultures have been killed off. Some people attribute health benefits to those bacteria, similar to the healthful benefits of yogurt containing live cultures. At a store called Morse's in Waldoboro, ME, the parking lot is jammed on weekends with people seeking jugs of fresh broth from the sauerkraut that owners David Swetnam and Jacquelyn Sawyer make on site. My wife and I paid a visit three years ago while on vacation in Maine. Waldoboro is in the middle of a German settlement and Morse's has been making sauerkraut since 1918. It's not a huge operation, but one of the few in the country that sells and ships fresh sauerkraut with live cultures. (Check their website at
http://www.morsessauerkraut.com/. They operate a small restaurant on the premises and a large deli department with a hefty selection of sausages, cheeses, packaged goods.) Watching David Swetnam run locally grown cabbage through his shredding machine, then salting big vats to begin the fermentation process, convinced me this was something I should be doing at home.

It does help to have a guide. And mine continues to be a book called Wild Fermentation by one Sandor Ellix Katz. Katz gives instructions for fermenting all kinds of foods, from yogurt to Andean corn-chewed beer. As Katz explains, the fermentation of sauerkraut starts with bacteria that are already present on the cabbage--hence wild--but really involves a succession of micro-organisms, a kind of tag-team effort that keeps good bacteria working on the cabbage in its brine, and keeps harmful pathogens out. In the beginning, Coliform bacteria take the lead. They produce an acid that is more hospitable to Leuconostic bacteria. As the brine solution becomes even more acidic, a third team member--Lactobacillus--assumes control. The good new is, you don't have to be concerned with any of this. As long as you season the cabbage with a more or less correct amount of salt at the beginning, and keep the cabbage submerged in its brine (remember I mentioned a ceramic dinner plate?), everything will be fine. At the elementary school where I teach "food appreciation," I recently made sauerkraut with kids as young as four. To illustrate the process, I made signs that hung around their necks indicating the three different kinds of bacteria. We made a circle representing the interior of the bucket. Then we had a second group of kids representing harmful pathogens trying to get inside the bucket, but being deterred, of course, by our tag-team of good bacteria. I think if four- and five-year-olds can make sauerkraut, it's a good bet you can, too.


For a small batch of sauerkraut, you'll need either a ceramic crock made specifically for this purpose (available on-line) or a heavy-duty plastic bucket. All authorities advise using a "food-grade" plastic bucket, meaning something that wont degrade or leach chemicals into your brine. I bought mine at the paint store. Chop five pounds of cabbage into shreds. Mix with three tablespoons fine sea salt, or pickling salt--mainly, a salt that has no chemical additives. If using a ceramic crock, load it according the manufacturer's instructions. If using a plastic bucket, pack the cabbage into the bucket very firmly. I lean on it with a clenched fist, a handful of cabbage at a time. When all of the cabbage has been tightly packed, cover the bucket with a clean dish towel. Check the bucket the following day. The salt should have drawn enough liquid out of the cabbage to create a brine at least to the top of the cabbage. Here's where you take a heavy ceramic plate that just fits inside the bucket (or a piece of non-resinous wood, such as ash, cut into a circle), press the plate down firmly until the brine flows over the top of the plate. Now you need to weigh the plate down. I use an eight-cup plastic container filled with water. You can also use a jug filled with water. If for some reason there is not enough brine in the bucket, add some water. Cover the bucket with the dish towel and store in a cool, dark place.


The bacteria seem to like a temperature around 68 degrees. Warmer, and they will make sauerkraut faster. Cooler, and they slow down. Check the bucket periodically. If you see mold or slime forming, not to worry. Just remove the plate, clean it off, wipe down the edges of the bucket, and resume fermentation. Don't be afraid to taste the brine or the kraut. It's done when it reaches your estimation of perfect sauerkraut.


Now, what to do with all that sauerkraut? Well, you can eat it as is. You will be getting the benefit of all those bacteria we discussed earlier. Or you can cook the sauerkraut as a side dish, or as the basis for a magnificent choucroute garnie. My method of cooking kraut is as follows:


2 tablespoons bacon grease or canola oil

1 large onion, peeled and sliced thinly lengthwise

1 Granny Smith apple, peeled and roughly grated
2 large cloves garlic, smashed then chopped fine

6 cups fresh sauerkraut

8 juniper berries, crushes

2 teaspoons caraway seeds


In a heavy pot or Dutch oven heat the bacon grease or oil over high heat until it just begins to smoke. Add onion and lower heat to medium low. Stir in apple and cook until onion is soft, about 8 minutes. Stir in garlic and cook about 1 minute longer. Add sauerkraut. Stir in juniper berries and caraway seeds. Cover pot and cook gently over low heat for about 1 hour, or until the sauerkraut has turned a golden color and is very tender.


For a real feast, and to show off your sauerkraut making skills, I suggest a choucroute garnie. This is French for "sauerkraut with a whole lot of pig." Basically you want to find a butcher with an array for pork products. I look for such delectables as streak-o'-lean, smoked ham hock, smoked pork chops, "bacon ends" (big chunks of trimmings from slab bacon), a good garlic sausage such as Kielbasa, and possibly some bratwurst, depending on how hungry you and your guests are.


To start, saute about three thick slices of streak-o'-lean in the bottom of a big, heavy pot or Dutch oven until the meat begins to brown and give up some of its fat. Remove the meat and add some bacon grease or canola oil as needed to saute the onion, apple and garlic as in the previous recipe. Add the sauerkraut, the juniper berries, the caraway seeds, then return the slices of streak-o'-lean along with a ham hock and up to a pound of bacon ends. Nestle the meat into the sauerkraut. Cover the pot and braise over low heat for about an hour, or until the bacon pieces are very tender. Meanwhile, brown the sausages over high heat. Add those and a couple of smoked pork chops to the pot, stirring them gently into the sauerkraut, and cook another half-hour.


Turn the hot sauerkraut , meat and sausages out onto a big serving platter for your guests to admire. Serve with boiled potatoes tossed with butter and chopped parsley and some root vegetables (such as carrots, rutabaga, parsnips) sliced and roasted with some extra-virgin olive oil. Crack a couple of bottles of an Alsatian Riesling or Pinot blanc. Put a hearty mustard on the table, along with a basket of sliced country-style bread.


Pantry Soup


After months of complaining about all the stuff jammed into our too-small kitchen pantry, my wife reached the end of her patience and started re-organizing during this week's bitter cold snap. (Really, I was just about to do it myself, I swear!) We set up a folding table in the foyer and, under threat of death if I touched anything, I watched my wife pull everything off the pantry shelves and begin composing little groups of similar items on the folding table, and on the kitchen counters, and on the kitchen table. "Look! How many bags of brown sugar do you suppose I've found?" she asked with just a bit of sarcasm in her voice. Can I help it that I teach classes where we use a lot of brown sugar?

What I did notice among all the odds and ends were small, half-used bags of pink beans, bundled together with rubber bands, and another little balled-up package of pearled barley. I remembered an eight-cup container of left-over chicken stock I'd recently made, just taking up space in the fridge. And the idea of some kind of soup began to form in my head. Because I don't have a recipe for this particular soup, and because I can't think of a better way to celebrate our newly organized pantry, I'm calling it "Pantry Soup." Otherwise, you might call it "beans and barley soup," but as you will see, this soup really is a mongrel.

I confess, "Pantry Soup" is not entirely my invention, merely a riff on a dish I found years ago in Bert Greene's The Grains Cookbook. (But isn't the power of suggestion wonderful, to say nothing of one's food memory bank?) Besides being a terrific reference for just about every grain in the world, this particular book contains a few recipes you'd have to consider definite keepers. One is the recipe for chollent that Greene borrowed from My Mother's Cookbook by someone named Fanny Silverstein. Those familiar with Jewish traditions may have fond or not-so-fond memories of chollent, the pot roast traditionally served on the sabbath. In orthodox practice, Jews are not permitted to engage in any kind of work--including cooking--on the sabbath day. So what they did in order to have a hot meal was take the cooking pot containing the pot roast ingredients to the local baker's the day before. At the end of the day, the pot would go into the oven as the fire was dying and remain there until the following morning, when it would be retrieved by the family intending to eat it. Apparently, some pot roasts survived this overnight treatment better than others. For those not interested in waiting overnight, Bert Greene's (or should I say Ms. Silverstein's) version only takes four hours of baking at 250 degrees. The main ingredients are: One big slab of chuck roast, preferably a blade roast with the bone in; one cup of pink beans; one cup of pearled barley; the usual soup vegetables, along with a small fistful of Hangarian paprika and powedered ginger. This was the sort of thing I had in mind when I saw the little bundles of pink beans and barley coming out of our over-stuffed pantry, minus the slab of beef.

Besides making a huge pot of soup, I also discovered something about my friends the pink beans. I had always assumed that the intense flavor of my chollent owed to the unctuousness of the beef blade roast. But after making "Pantry Soup," I realized this impression was faulty. Much of the intense flavor actually comes from the beans. Otherwise, the soup looks very much like the chollent, with the starchy barley, the beans, and not-too-much stock combining in a wonderfully velvety, deeply flavorful pottage. I wish I could say I measured exactly what I was putting into the pot as I was making this soup. But in the spirit of just cleaning out the pantry, I didn't, and now I regret that a little, but not too much, regret not being an ingredient we use around soups. I know the finished soup was a little heavy on the beans and barley, and required adding more stock. This is where we get to the mongrel part, because I ran out of the pre-made chicken stock and had to use what was left in a container of beef broth. Then I had to fetch a can of what I thought was chicken stock from our other pantry, but that turned out to be beef broth as well. So in the end the soup tasted even more like the aforementioned chollent than I would otherwise have a right to expect.

Anyway, here's approximately what you do to arrive at "Pantry Soup":

3 tablespoons extra-virgin olive oil
1 large onion, peeled and diced small
2 large carrots, peeled and diced small
1 teaspoon coarse salt
2 large cloves garlic, smashed and minced
1 cup pink beans
1 cup pearled barley
8 cups stock (can be chicken, beef, vegetable or combination, more as desired)
Freshly ground black pepper to taste

In a large, heavy soup pot or Dutch oven, heat the oil over high heat until it just begins to smoke. Toss the onion and carrot into the pot and lower the heat to medium-low. Stir in salt. Cook until onion is soft, about 8 minutes. Stir in garlic and cook another minute. Add beans, barley and stock. Increase heat until soup just begins to boil, then reduce heat to low, cover the pot and allow soup to cook until the beans are perfectly tender, three hours or more. Season with pepper. If the soup seems too thick, add more stock or water. Serve hot with a good, crusty bread.